My Spooky (And Super Simple) Kid-Approved Halloween Decor
You know what is scarier than that 5′ spider? The “holiday extreme” version of me because I’m going to decorate for ANY holiday this year. This is only “stage one” because the month is long and I am desperate to stretch it all out and have any excuse to decorate, craft, and DIY with the kids and makeup/implement lots of new “seasonal rituals”. We really NEED the holidays this year and because we can’t celebrate them like we usually can with friends/kids, I feel excited to find new ways to make this feel special for all of us. If you are on the fence about doing these things early trust me that when we brought out our Halloween bins last week it really changed the energy in the house, in a really good way. Even Brian Henderson suggested starting early and was met with 3 enthusiastic YES’. And since it looked pretty dang cute (and the kids were so proud of their DIYS) Sara popped up and shot it with me (safely).
So this year for Halloween decorations we have a combination of using what we’ve already had for years, some super easy DIYs, and added a few new affordable pieces that had high impact (hello 5′ spider). Here we go.
We Kept It Neutral

You might be like my daughter who innocently asked, “but mama where is the Halloween orange color?” and my answer felt as pretentious as it still does – I just wanted it to be more calm, tonal, and neutral. The truth is I live way better on a daily basis with less bright colors around, a truth that I’m not sure has only to do with this house, or me forever. I figure once we go get real pumpkins that should satisfy her traditional holiday values (layer 2, near the actual holiday). I brought in a lot of black (spiders, birds, branches) and white (webs and pumpkins) but since we were living with it for a month I didn’t want it to be a Halloween explosion because my “clutter body disorder” would rear its head (which can be VERY scary).
We used the white spider webs that we’ve had for years (but are still available) on the big A-frame windows (with clear command strips). It is so high impact (and covers such a large amount of real estate) for $10. Over the years we’ve figured out how to hang it the easiest, but I still miss Emily Bowser helping me do it.

It’s “Kid-Friendly Spooky” (But Not Scary)

What does “kid-friendly spooky” mean? Well, it’s embracing spiders, ravens, skeletons, candles, and pumpkins, but not blood and gore and stuff that actually scares the crap out of them (mostly so they don’t wake us up with nightmares). The white fabric on the mantel is called “spooky fabric” and it does the trick pretty fast (for a party you could throw it over all furniture like a haunted house). We’ve had those light-up pumpkins for 4 years now and love bringing them out every year (and they are plug-in so you can leave them on without running out the battery). The glow at night is a great ambiance.
Birdie and I spray painted sticks for the coffee table and the mantel arrangements – SO EASY. If you wanted to go one extra step (or say if we were to have friends over for Halloween) I would put spiderwebs on the branches with spiders. But I felt that this was enough for now. I also spraypainted the broom black (it had cute autumnal tones on it, but I wanted it to be simpler).
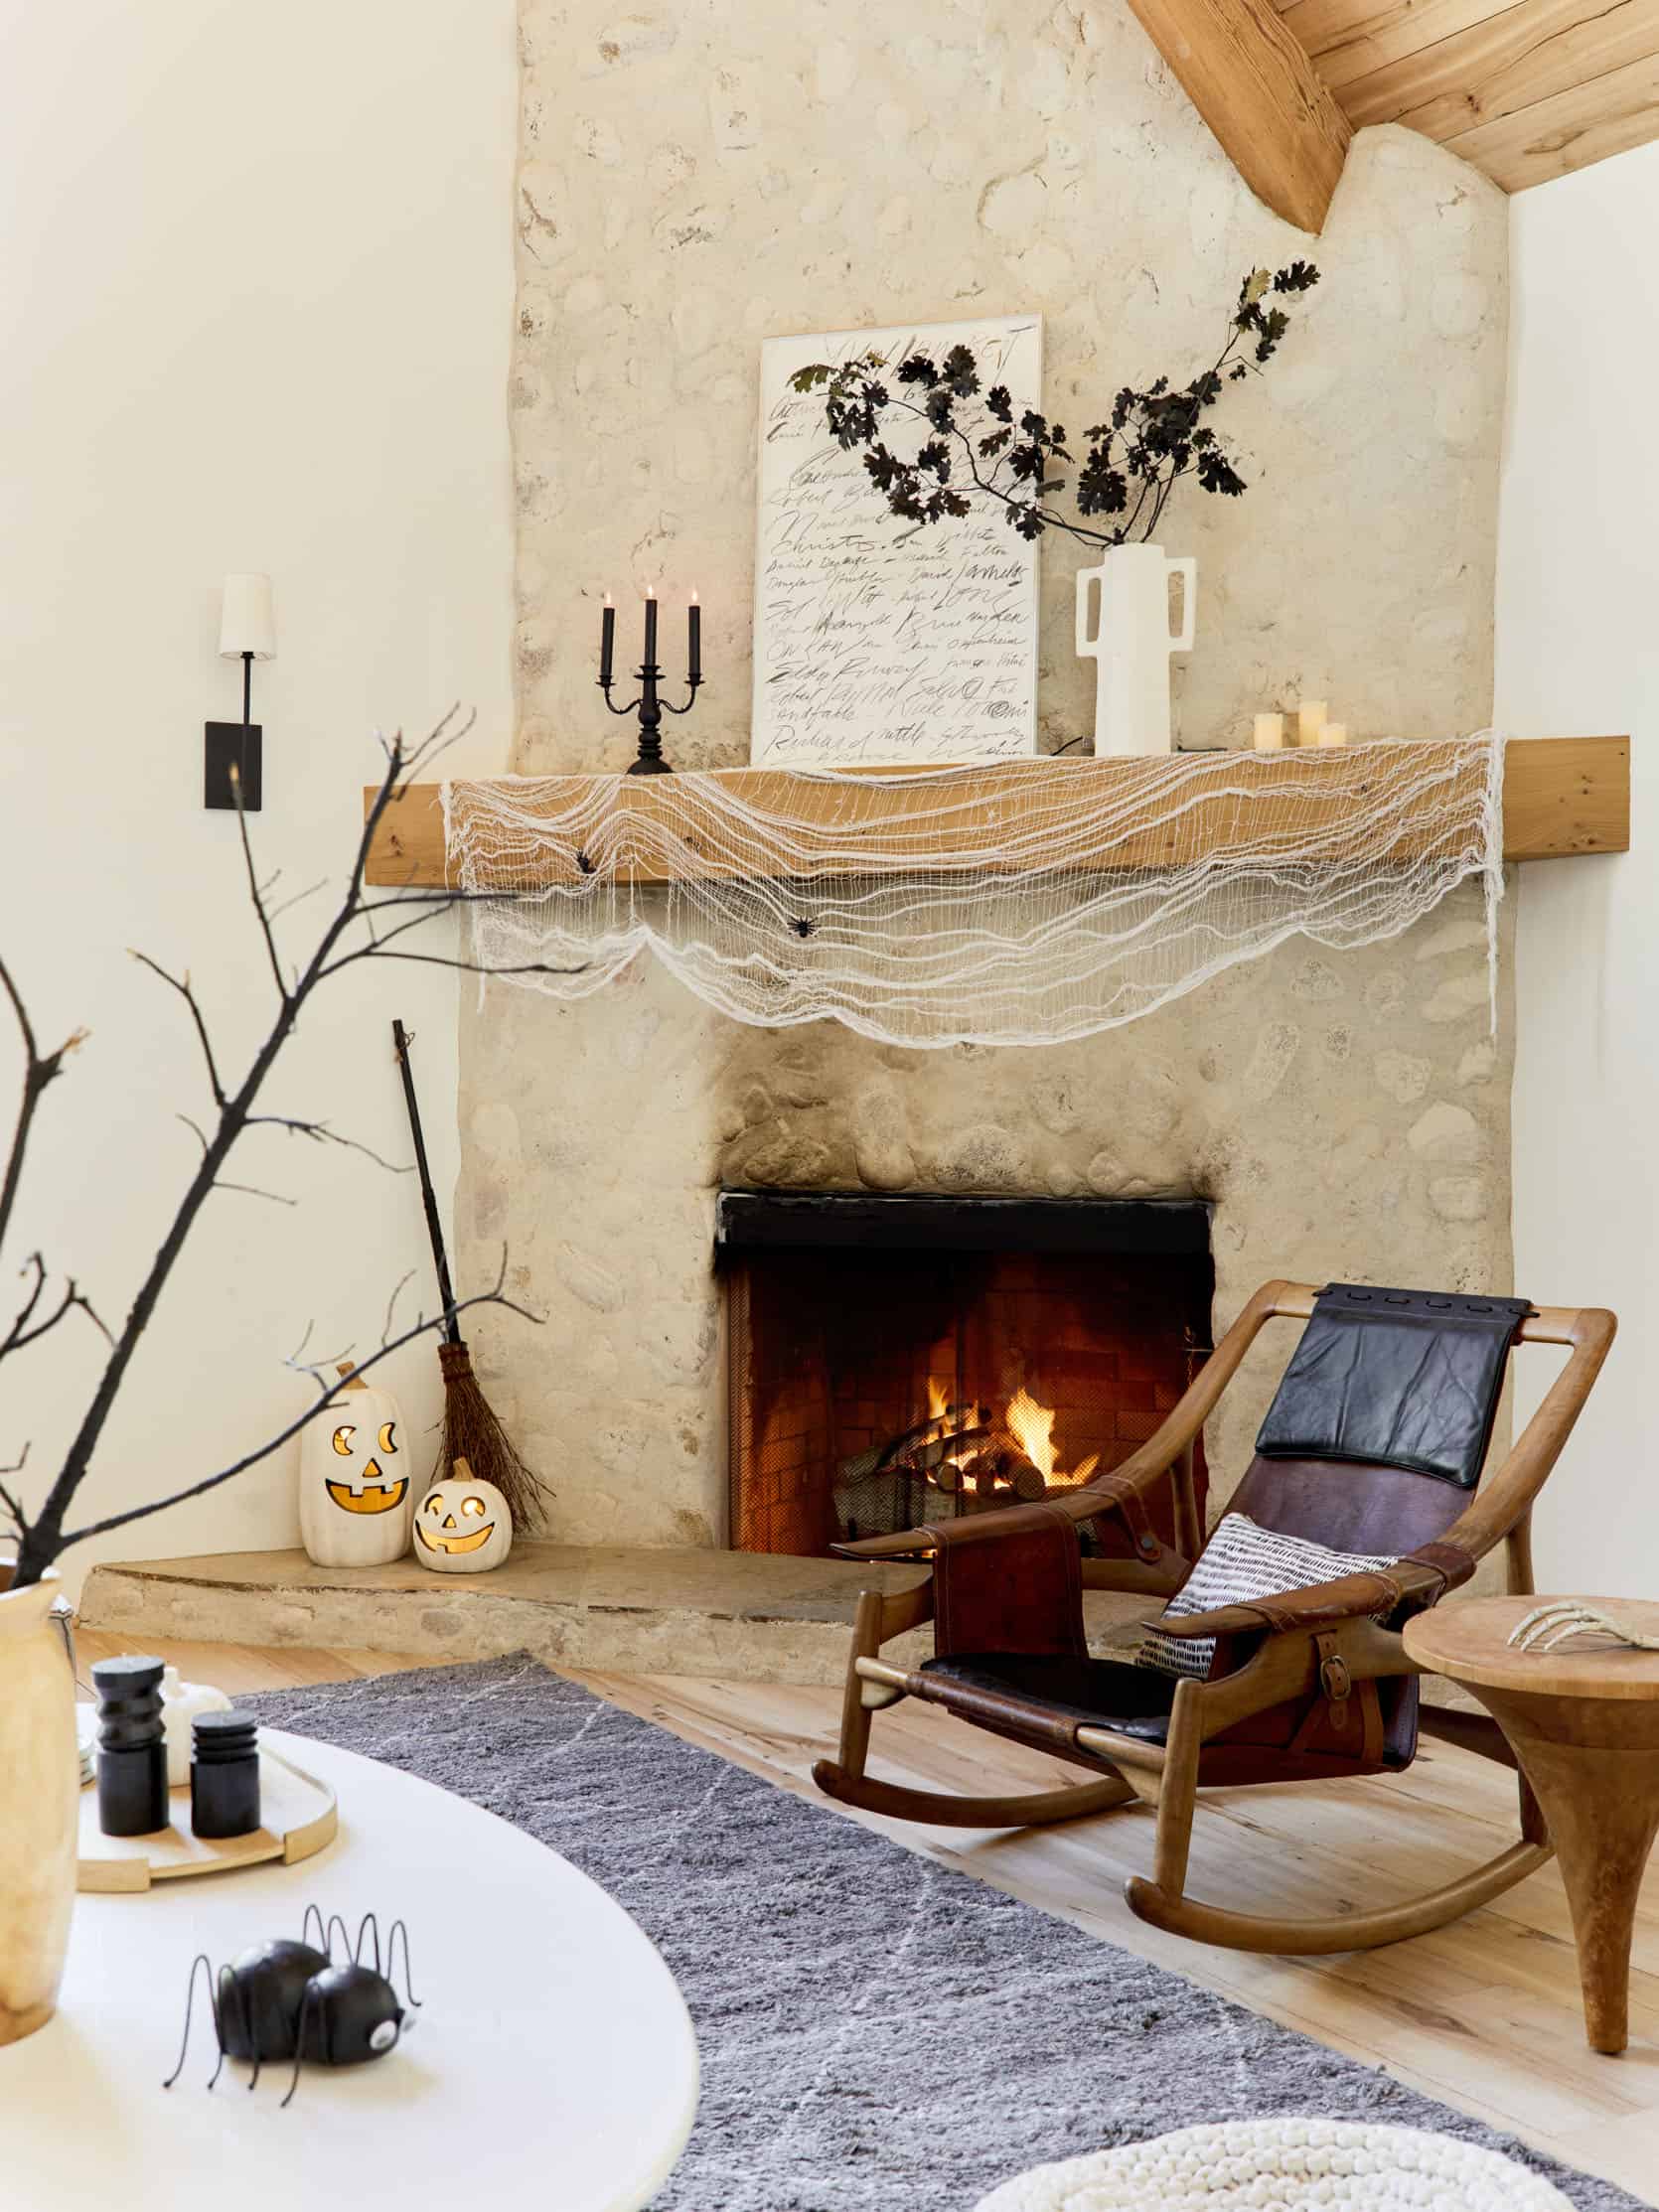
Repeat Motifs (To Reduce The Chaos And Make It Easy On You)

As you can see almost everywhere there are spiders, webs (or fabric), skeletons, and black sticks. SO EASY, and everything thus far is really affordable.
Go For High Impact Pieces That SCREAM Halloween

That huge spider is AMAZING. It wasn’t super cheap ($30) but it was so easy to hang (command strip and fishing line) and immediately gave it that graphic punch that the room needed. The big white web on the A-frame windows is great (but quiet) so I love how this spider acts like a huge Halloween sculpture on the wall (and I think it looks awesome breaking up a window or even art).
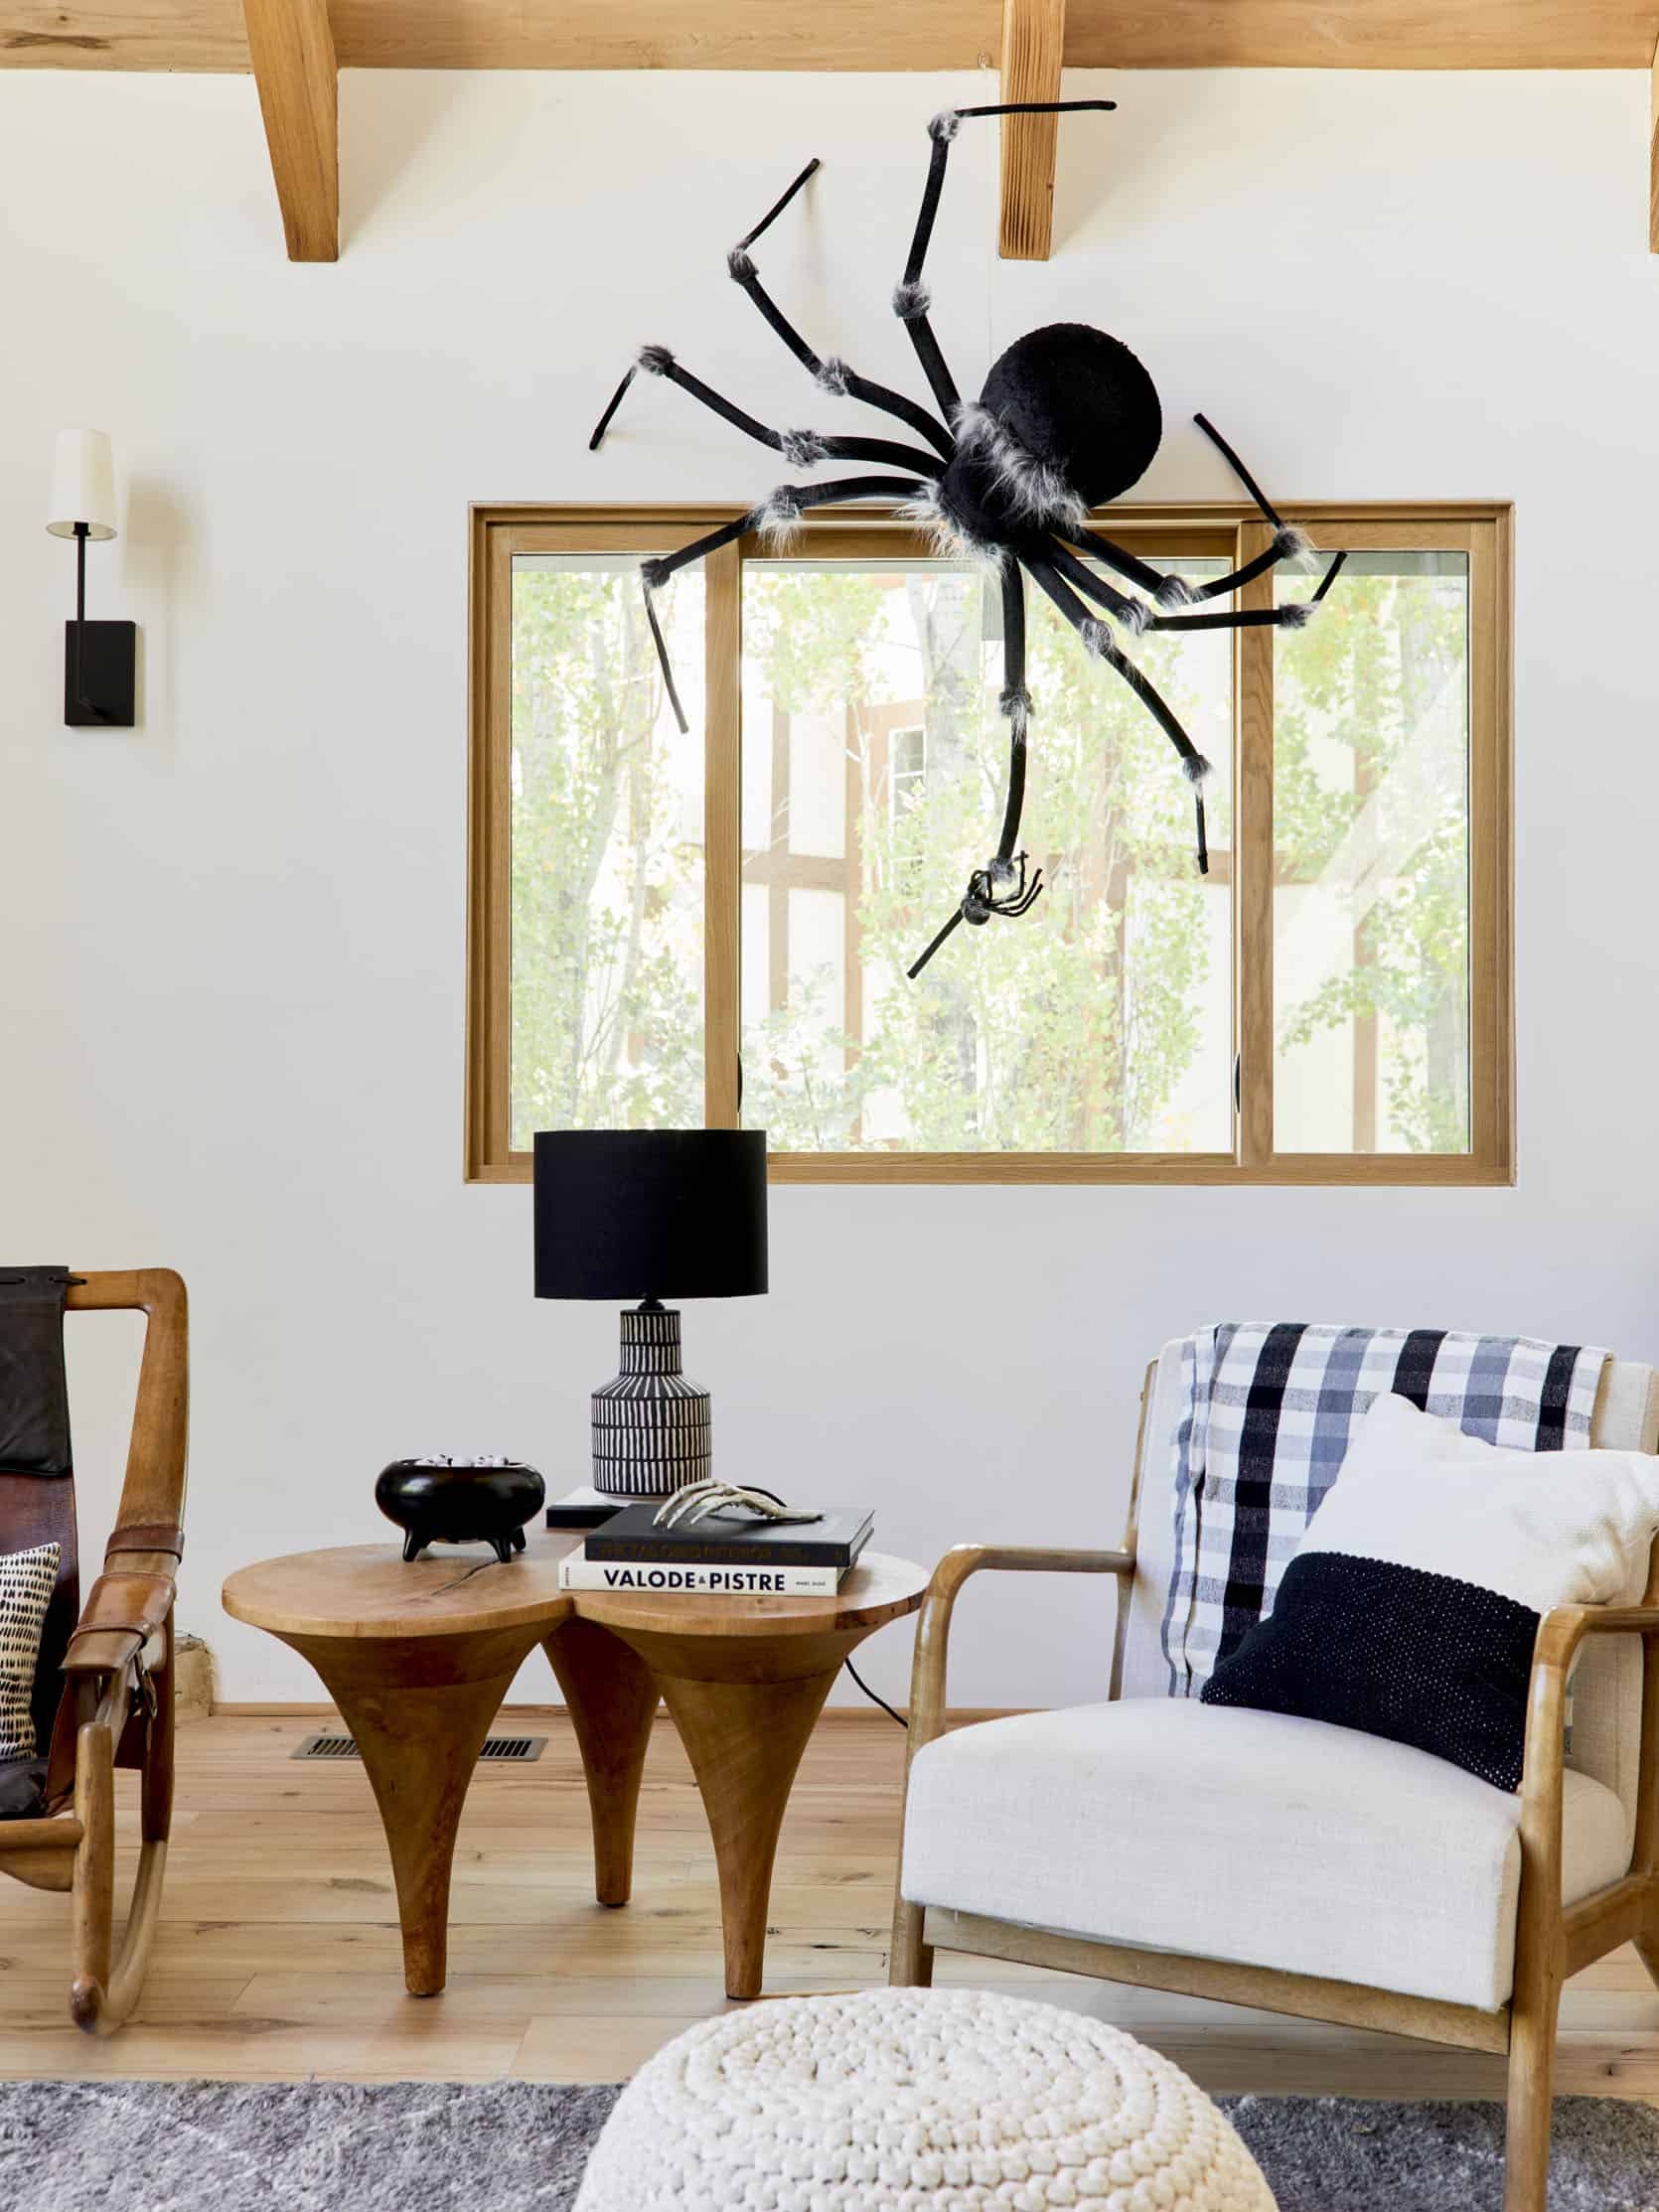
On the table, we have a footed black bowl (no longer available from West Elm) full of eyeball candies (of which the kids beg for all day every day and I’ve GOT to put them away) and a skeleton hand. And yah, I switched out some of the pillows, books, and throws to be in our color theme.
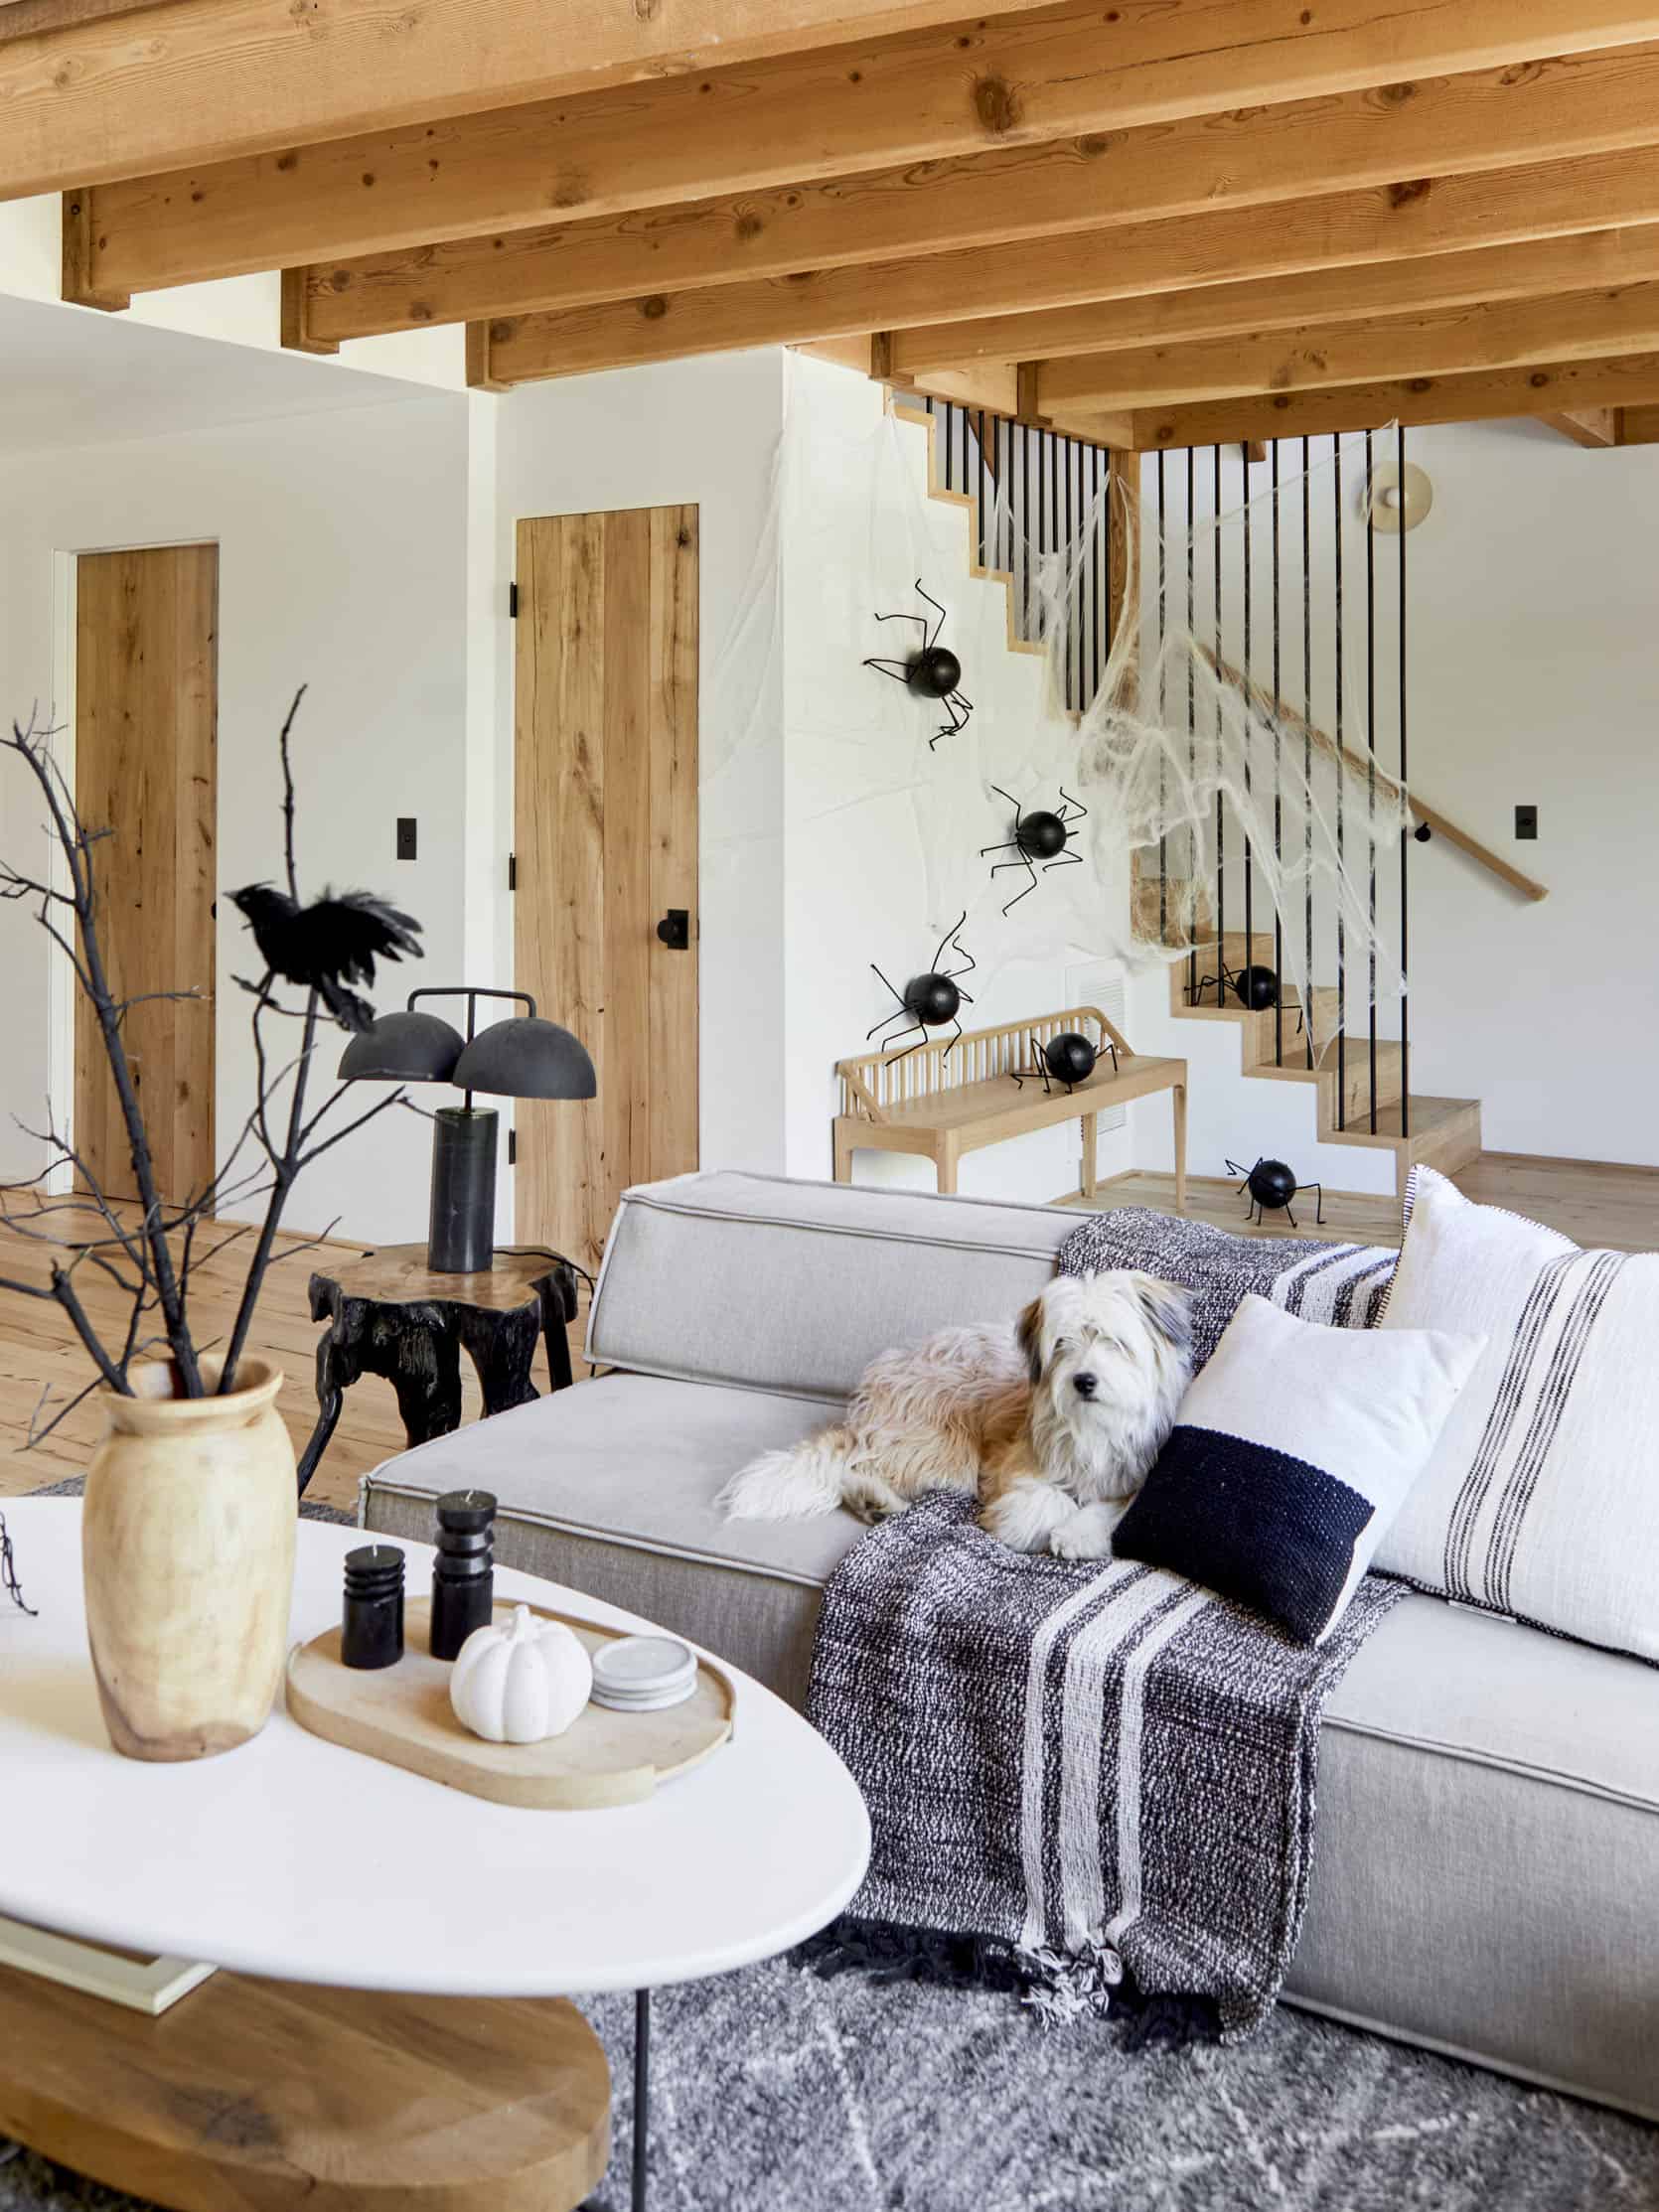
Easy And Fun DIY Spiders

I saw these on the Pinterest and was like, “yah, those look easy” and they really were. The kids helped with them and all we had to do was paint 6″ styrofoam balls with black acrylic paint, then shove in black pipe cleaners in “leg shapes”.

We got better and better with every single one (HOT TIP – Make the legs first and uniform. Then shove them in on the lower 1/3rd of the “body” -and pretty close to each other).
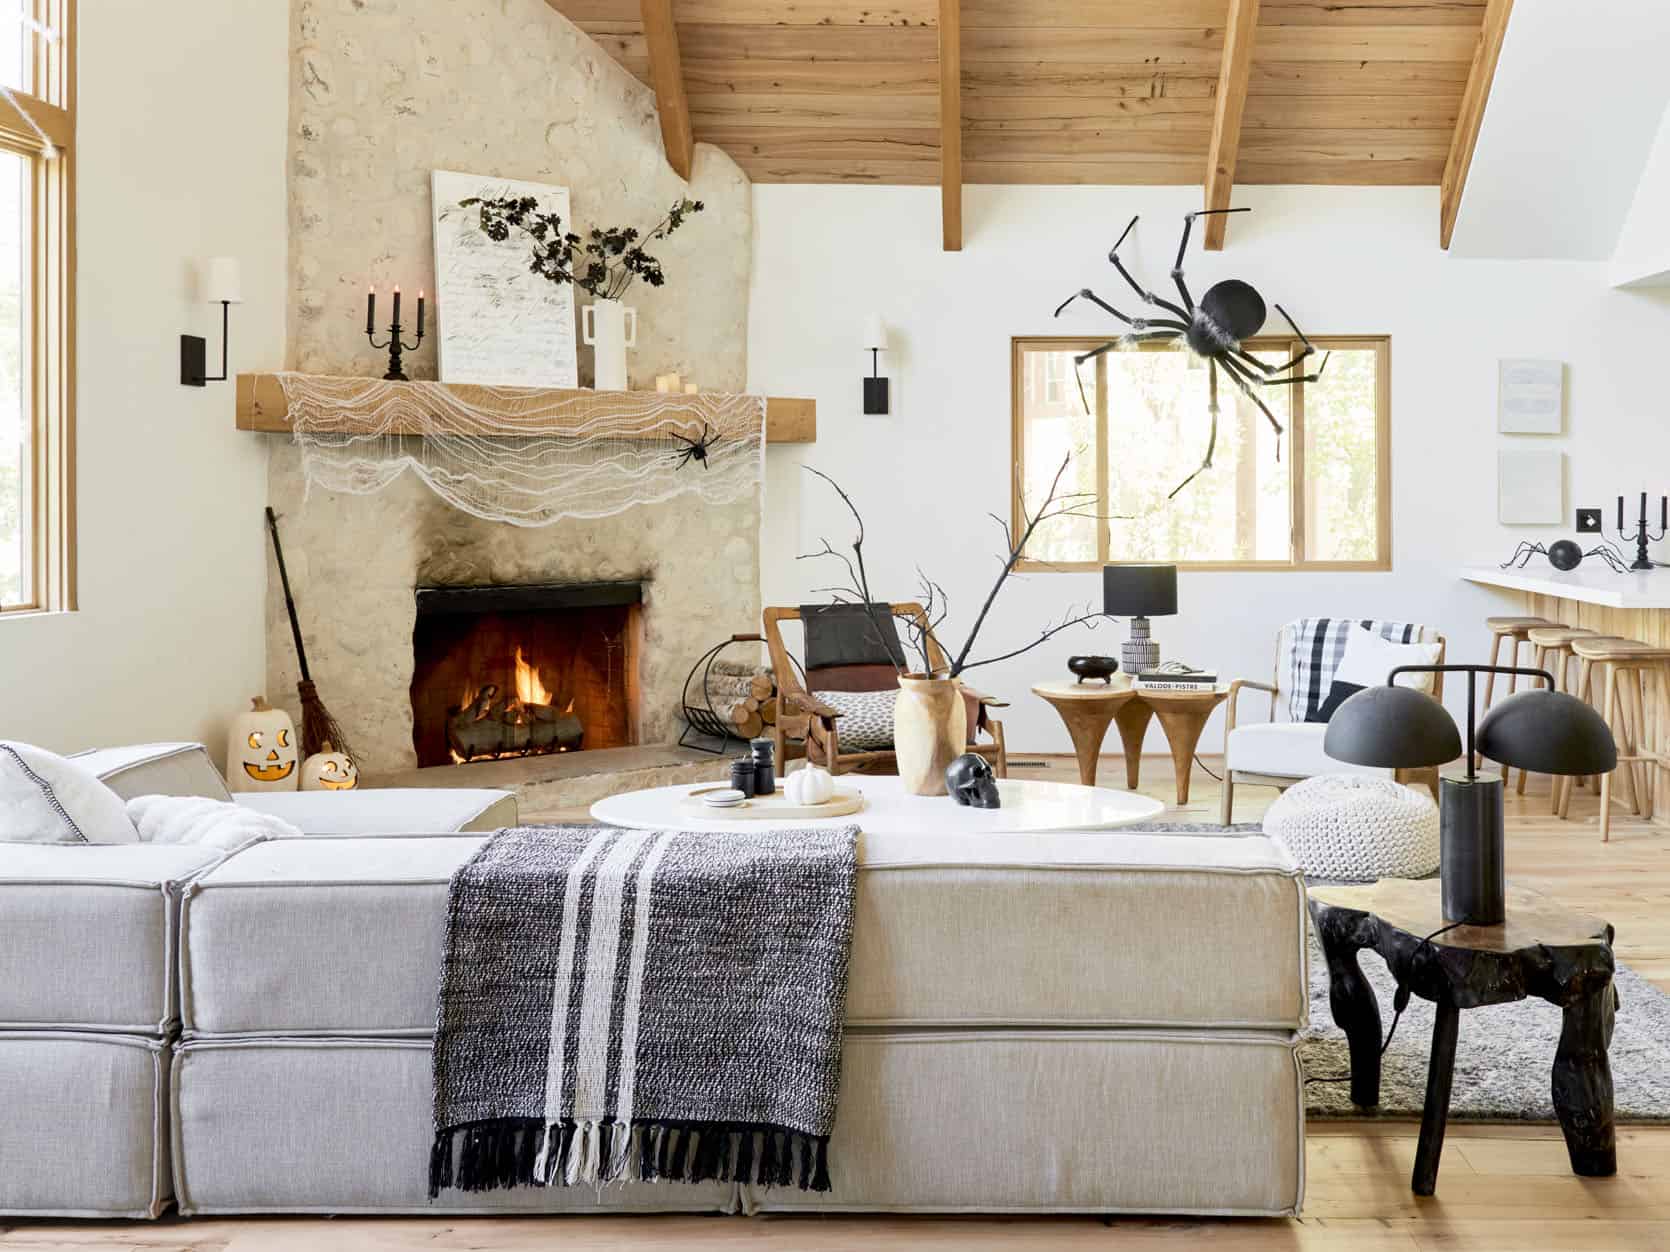
Overall I LOVE how the living room turned out. I know it’s more than most people would do (and less than a lot of people would do) but it’s extremely livable, fun and definitely feels like Halloween. THE KIDS LOVE IT.

AN EASY AND QUIET ENTRY
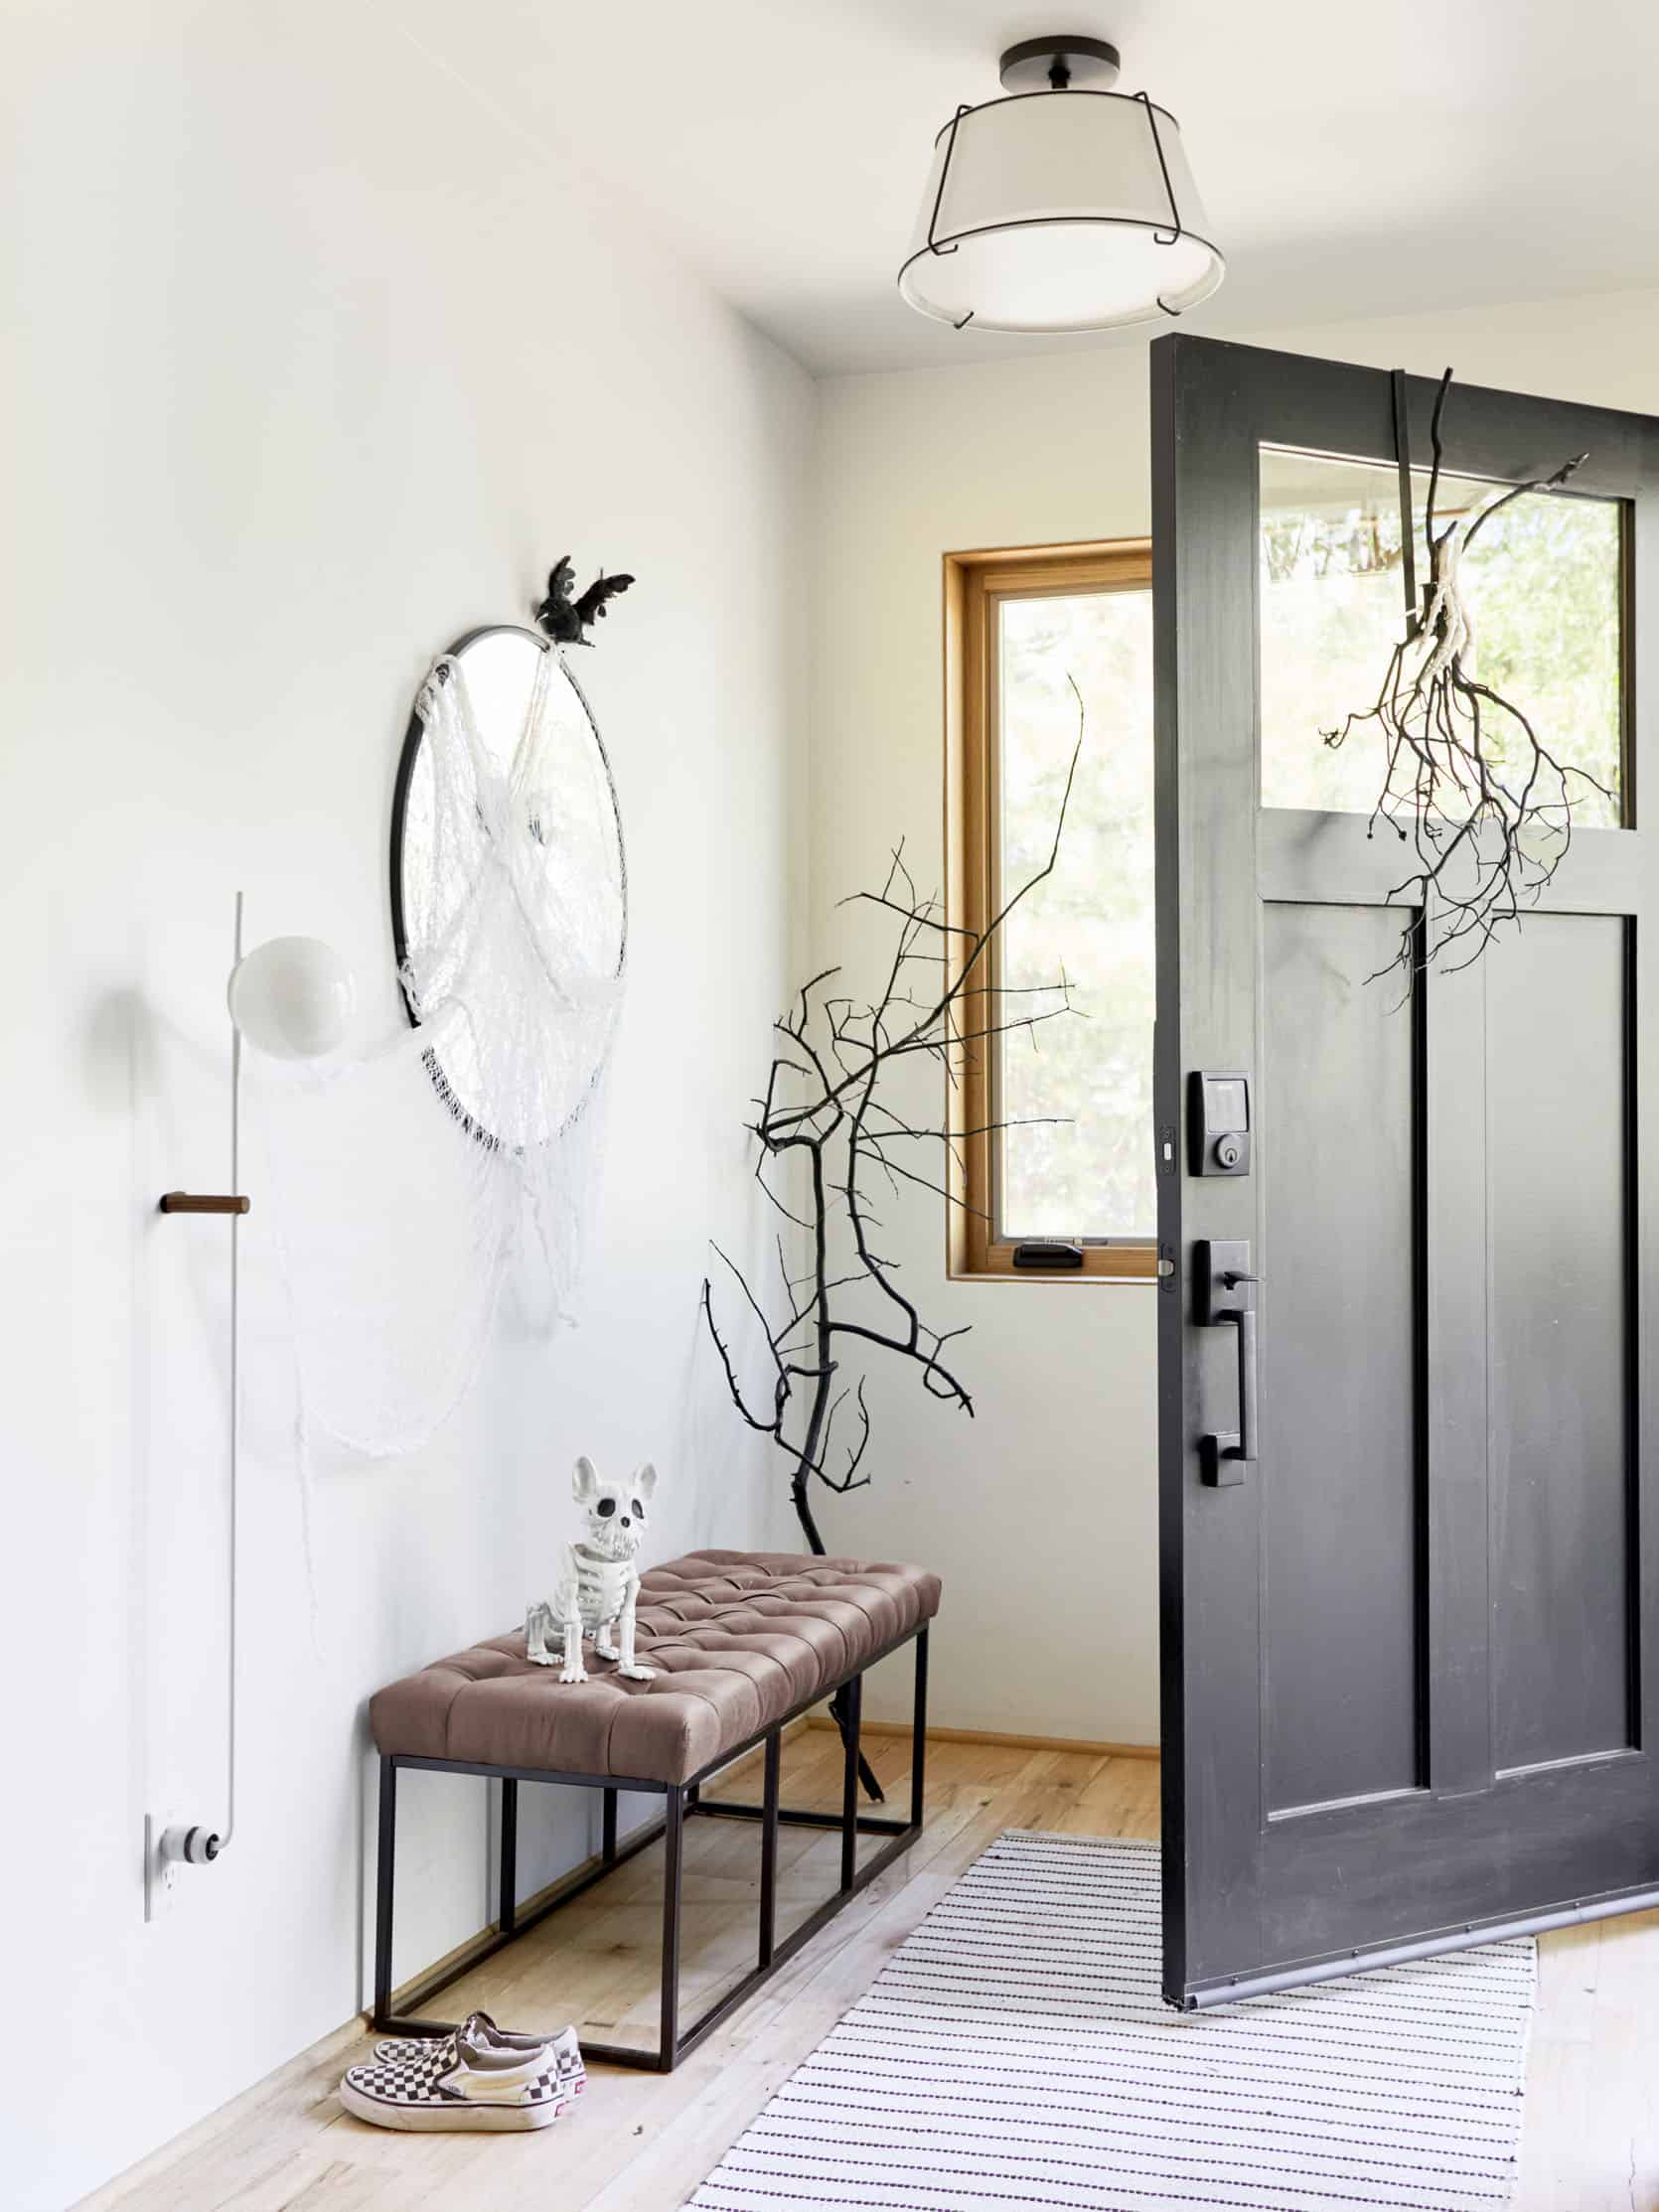
In the entry, I leaned a huge dead (and spray painted) stick in the corner for a sculptural effect. I then of course, added our skeleton “Boris” (my friend’s french bulldog) which I find hilarious that he’s waiting at the door so patiently and to finish off, covered the mirror in spooky fabric, a bird and some large googly eyes. Again, if you want to amp it up throw some web on the stick, but once I took in the full room I just felt like the spooky stick was enough (this is how I end up over decorating, by considering each vignette before the whole space).

It was pretty darn easy.
Hot Tip
Cover any mirror with spooky fabric or web – so easy and cheap and says Halloween immediately without adding barely any clutter.
INTRODUCING SKELLY
Skelly is saying hi so I guess we should introduce her.

I decorated the front door with the rest of the pumpkins that I already had (that pumpkin “ottoman” is new) and made a hanging “wreath” out of sticks and another skeleton hand. I put Skelly on one of our outdoor chairs and I’m KICKING myself that I didn’t put a witches hat on her head or dress her up somehow AND I forgot to make her wave in this shot. It’s hard to be up in the mountains with less access to stuff (but it also makes me spend way less money and I do zero returns).

There she is. She is $40 at Target and well worth the splurge. I wanted to put her everywhere in the house (and she has been out since September 25th so she’s sat in a lot of chairs). Those pumpkins do light up but we didn’t have a black extension cord so I’m going to get one before Halloween.

Again, I made that “wreath” from dead manzanita sticks, spray painted black tied with a black zip tie, and then added in the hand. We just hung it on our wreath hanger (but a command strip would work, too).

It’s only almost poked out Brian’s eyes like 4 times now, but he’s just got to learn to open the door wider 🙂
INTO THE DINING ROOM

I’m pretty surprised at how much I like this. That gauze cloth “chandelier” really engages the space (and we just hung with command strips on the ceiling) and then that huge spider is so graphic and creepy, but just one thing. SO EASY.

We added more painted sticks as our arrangement, some black candles, holders and finished it off with a big skeleton snake. I added some pillows back to the niche and I kinda LOVE how it turned out.

The snake comes in big and small versions and its pretty great.
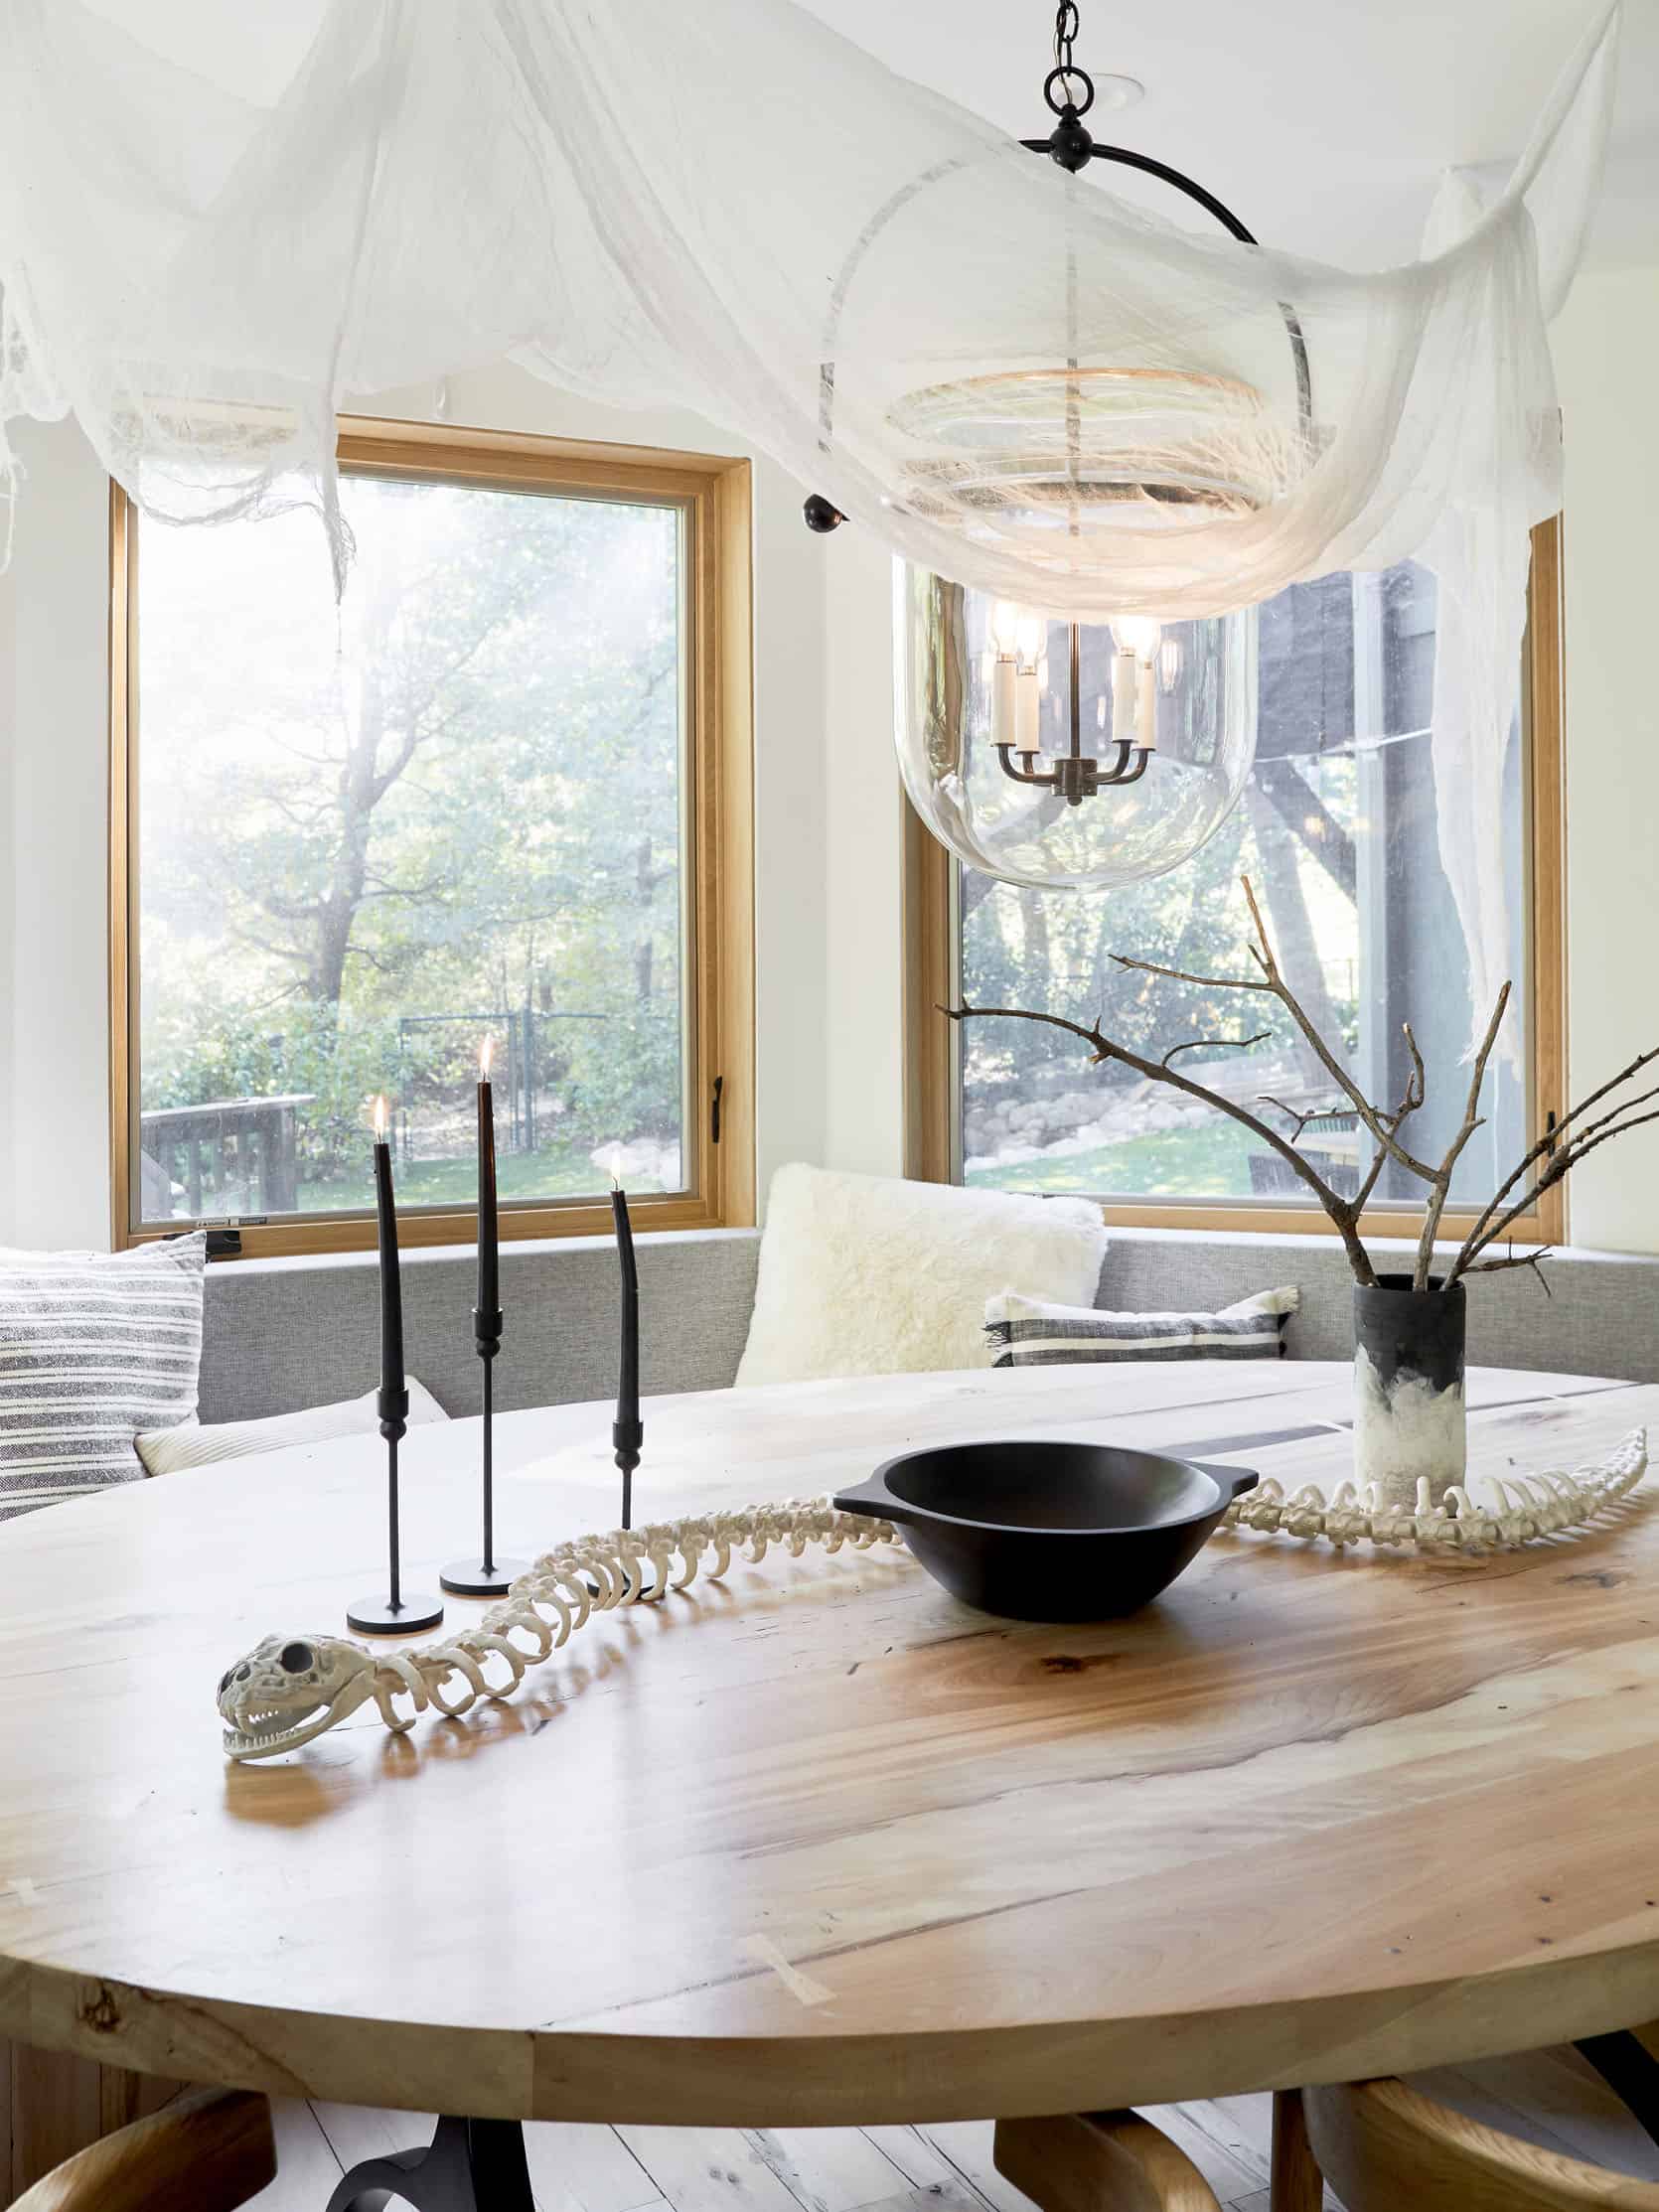
I’m excited to put a TON of either candy or baby pumpkins in that bowl but just didn’t have anything on hand. This tablescape has stayed up for the week and it’s pretty easy to maintain.


The Halloween decor is helping our daily excitement level for sure. It’s making me so excited to do some more DIYS, have an outdoor Halloween movie night, carve pumpkins – all the things that we usually have to “fit in” to our busy school/social/work schedule and now get to look forward to. Thanks for tuning into our family and I hope you got some “spooky but not scary” tips. xx
**Photos by Sara Ligorria-Tramp



Leave a comment